Test infrastructure and execution
This tutorial shows you how to set up your components for testing, loading all the resources required for the tests, and starting up the basic services.
Test Infrastructure
We recommend you create a testing directory structure beside your source code with the following directory structure to create a division between the application code and the tests for it.
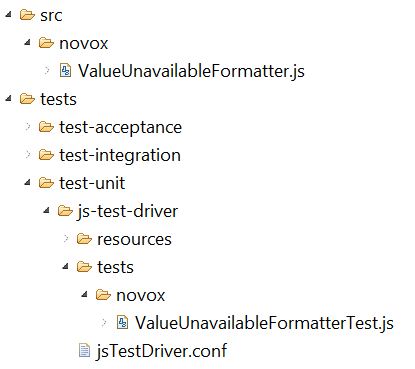
Here, novox is the root package name of your JavaScript namespace. You should create a parallel test class file(s) for every class you wish to test.
JsTestDriver.conf file
The example jsTestDriver.conf file (shown below) runs tests from all the JavaScript files in the tests directory (inside test-unit).
server: http://localhost:4224
basepath: .
plugin:
    - name: "BundleInjector"
      jar: ../../../../../../../../sdk/libs/java/testRunner/js-test-driver-bundler-plugin.jar
      module: com.caplin.jstestdriver.plugin.CutlassBundleInjectorPlugin
load:
    - bundles/js/js.bundle
test:
    - tests/*.js
A jsTestDriver.conf file is created automatically when you create a new bladeset or blade (within a bladeset). It should be noted that these files are not the same. They are created at different levels in the directory hierarchy, so the number of ../ in the jar: line will be different.
|
Additional bundles
By default the generated jsTestDriver.conf files exclude three of the four available bundles. To include the internationalisation, html and xml bundles, you must add the following:
load:
    - bundles/i18n/en_i18n.bundle
serve:
    - bundles/html.bundle
    - bundles/xml.bundle
When the tests are run, a bundles directory will be created by BladeRunnerJS under the relevant js-test-driver directory containing the required bundles as shown:

Service Registry
In order to enable your test to use these bundles, besides adding these to the jsTestDriver.conf file, you must also load them into the correct application services. For example the xml.bundle needs to be accessible to the XmlResourceService:
if (!caplin.core.ServiceRegistry.isServiceRegistered("br.xml-service")) {
  var oXmlResourceService = new caplin.services.providers.CaplinXmlResourceService("/test/bundles/xml.bundle");
  caplin.core.ServiceRegistry.registerService("br.xml-service", oXmlResourceService);
}
The relevant XML can then be accessed correctly by the test and by the system under test:
var oXmlResourceService = caplin.core.ServiceRegistry.getService ("br.xml-service");
var eTradeModelNode = oXmlResourceService.getXmlDocument("tradeModels");
Test Execution
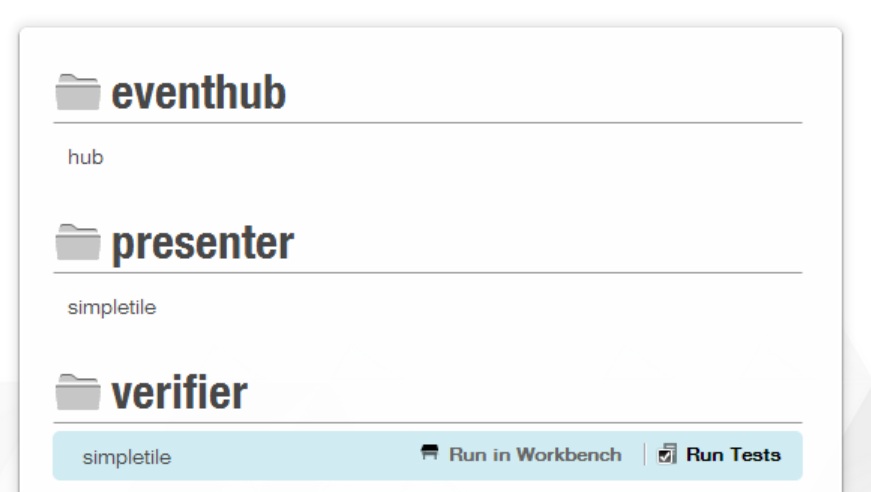
The easiest way to execute a test is via the BladeRunnerJS dashboard. Simply launch the application dashboard and click on "Run tests" for the blade in question. This will look at the jsTestDriver.conf file of the acceptance and unit tests for that blade, and will execute the tests specified in that file.
Alternatively you may select which tests to run via the command line. Simply navigate to the BladeRunnerJS sdk directory and use the brjs test command. For example:
-
To execute all (unit and acceptance) tests for an app:
brjs test ..\apps\{app_name} -
To run unit tests at a bladeset level:
brjs test ..\apps\{app_name}\{bladeset_name} UTs -
To run acceptance tests at a blade level:
brjs test ..\apps\{app_name}\{bladeset_name}\blades\{blade_name} ATs
The test types are ATs (to run acceptance tests), UTs (to run the unit tests) or ALL (the default, to run both acceptance and unit tests).