Use Liberator Explorer to request and send data
Here’s how to use Liberator Explorer to examine Liberator’s data and to send (contribute) data to the Liberator.
| Liberator Explorer is only intended for use in development environments. It isn’t secure enough to use in production systems. |
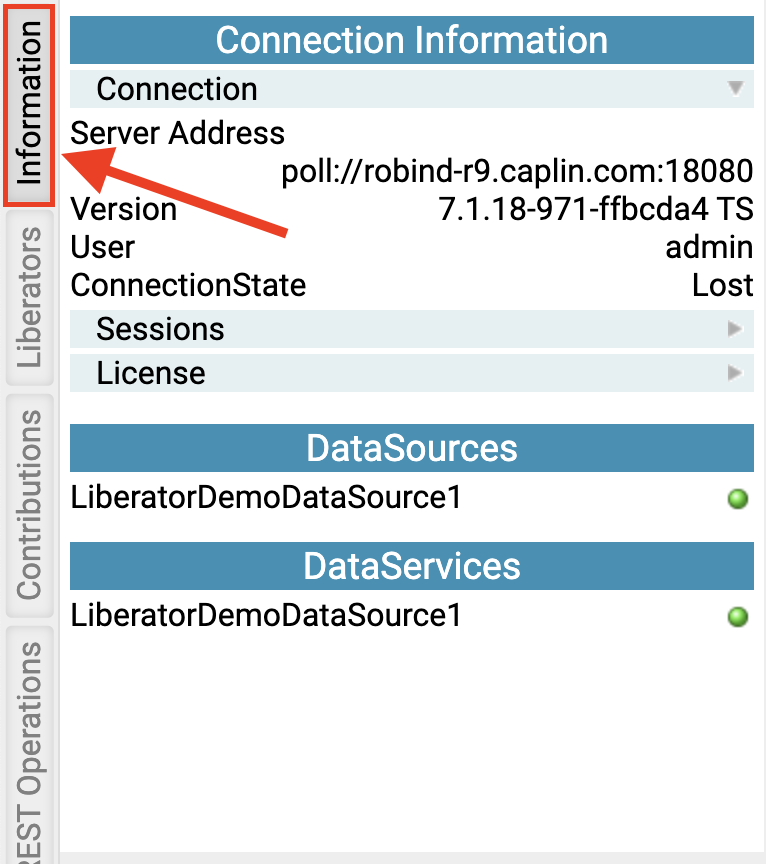
Viewing the connection status
You can click on the Information tab to view the status of a Liberator connection.
You’ll be given some information about the connection, the statuses of the DataSource applications connected to the Liberator (typically Integration Adapters), and the state of the Liberator’s data services (if you have permission to view that information).
Connecting to a Liberator
You can start Liberator Explorer from a running Liberator’s home page:
-
From the Menu, select Diagnostics
-
On the Diagnostics page that’s displayed, select the Liberator Explorer link.
-
Supply a valid username and password if requested (for a newly installed Liberator, these are
admin,admin)
Liberator Explorer runs in a new browser tab and connects (via StreamLink JS) to the Liberator that hosts it.
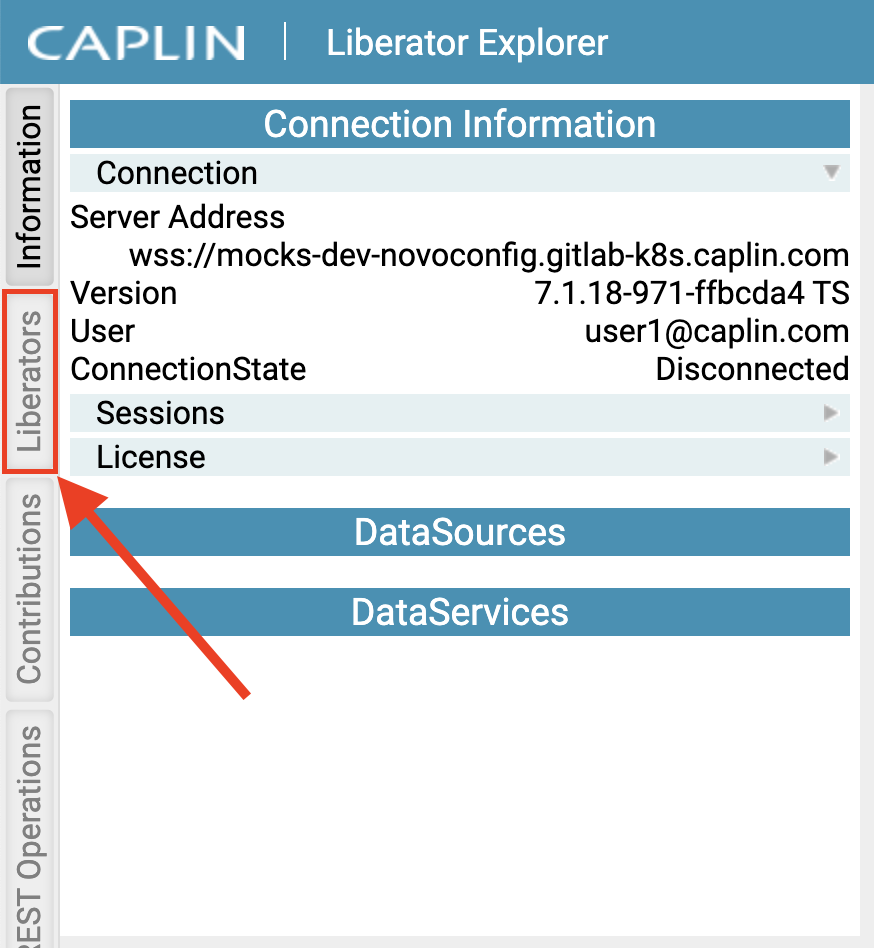
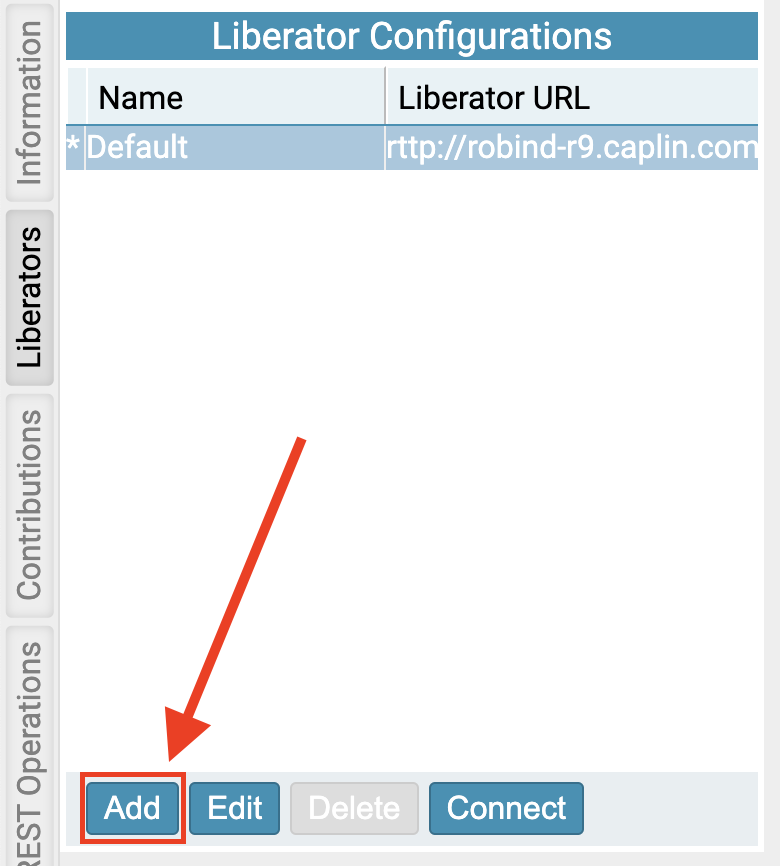
Now you can connect to other running Liberators:
-
Select the 'Liberators' tab in the left panel.
-
In the newly opened Liberators view, click on the button labelled 'Add'.
-
Add the server (Liberator) address in the format
<hostname>:<port>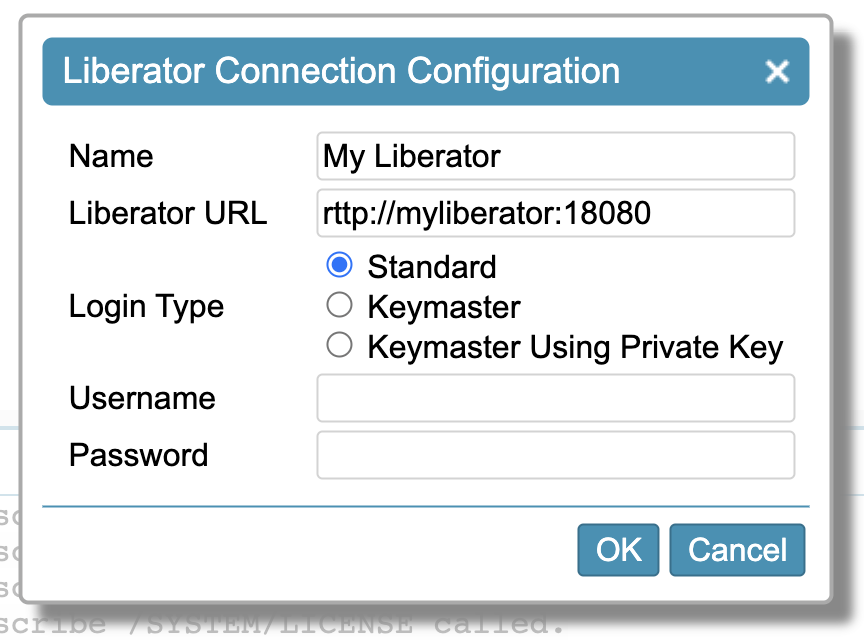
-
Enter authentication information:
If the Liberator is configured to use simple username and password authentication (the default for a newly installed Liberator), select Standard and enter a username and password that are valid for that Liberator. For a newly installed Liberator, the username is
adminand the password isadmin.If the Liberator is configured to use KeyMaster, select Keymaster Using Private Key and enter the KeyMaster URL. The URL must point directly to the Keymaster servlet URL, like this:
http://mymotif.caplin.com:8080/novotrader/servlet/StandardKeyMaster
-
Select Save to add the new connection. Liberator Explorer will attempt to connect to the additional Liberator.
Or you can select Cancel to discard your changes.
Subscribing to a subject
Follow the steps below to subscribe to subjects.
-
If you do not have a subscription tab open already, you can open one by clicking on the button with the plus symbol in the top right of the screen.
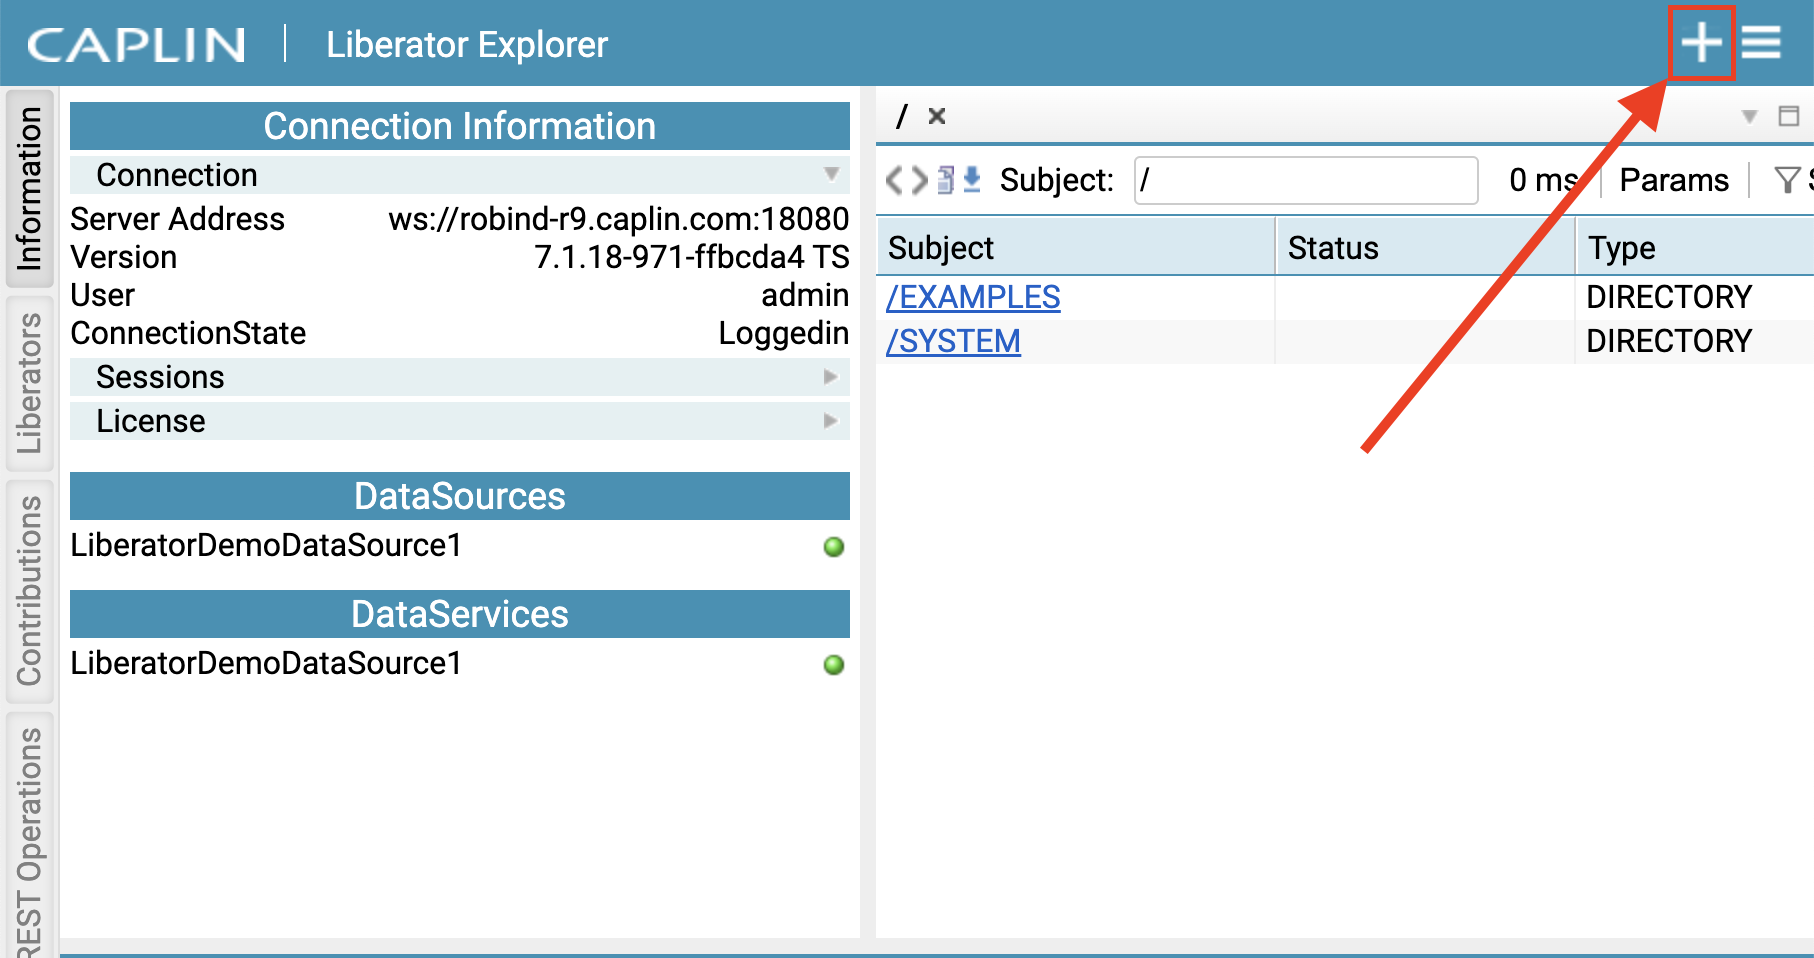
-
Select the input labelled 'Subject:', type in the name of your new subject in the box, then press the enter key.
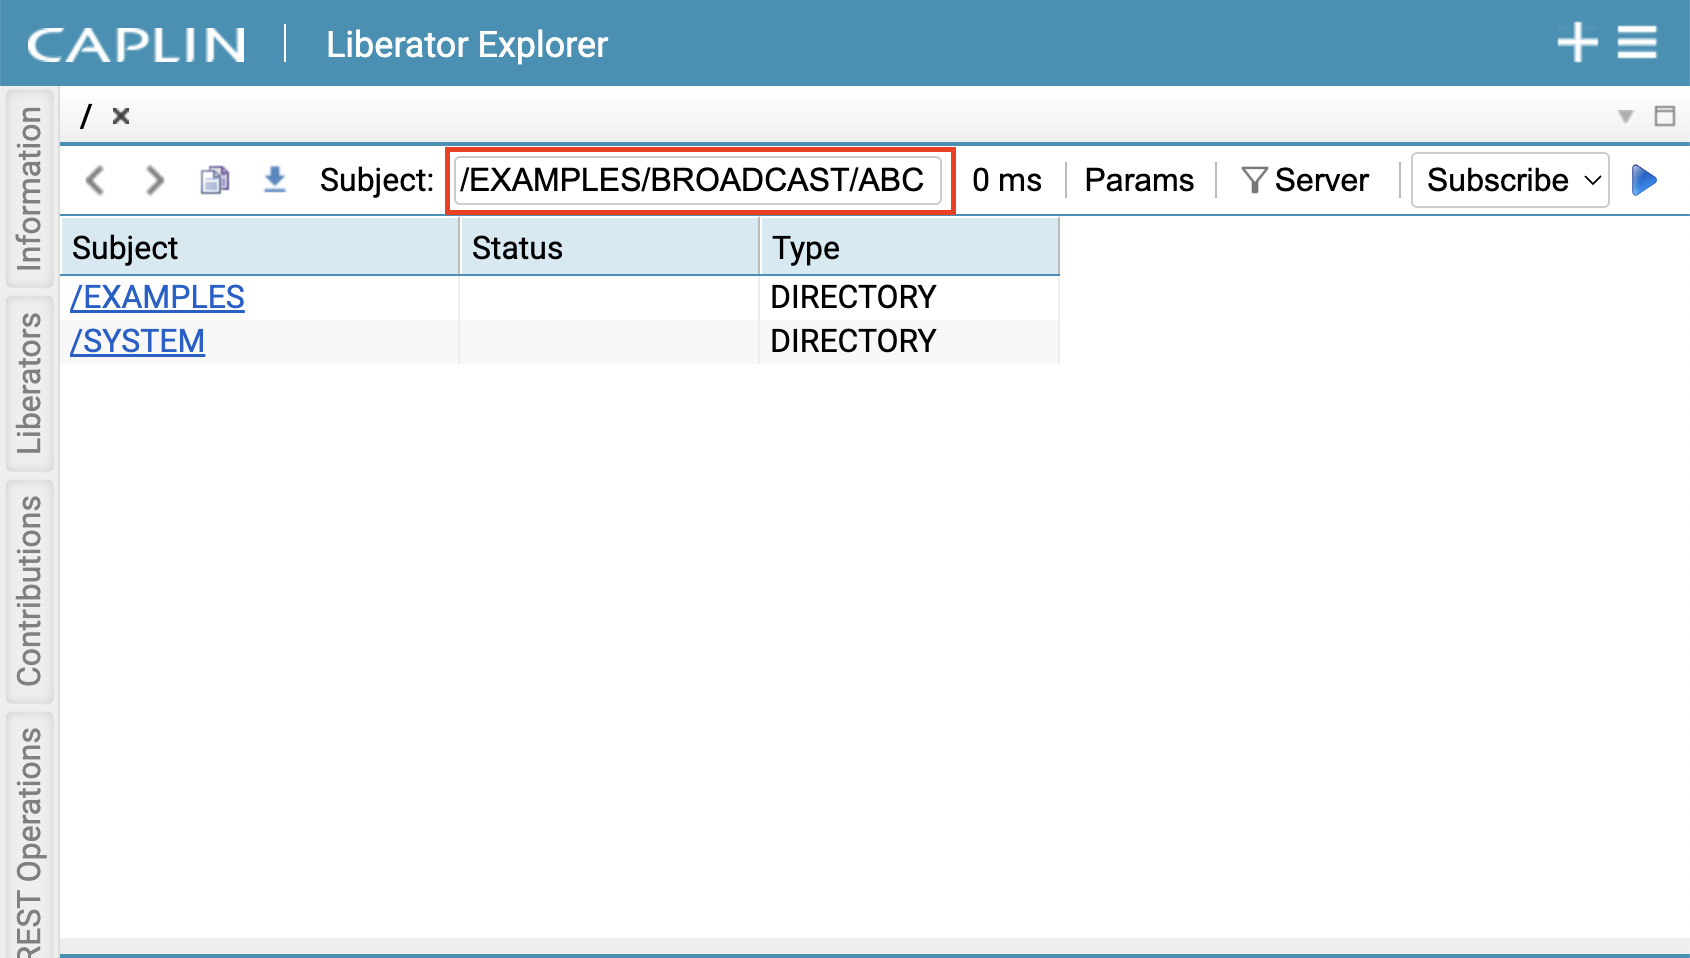
Once the subject has been entered, it is automatically subscribed to and its values begin to appear in the grid:
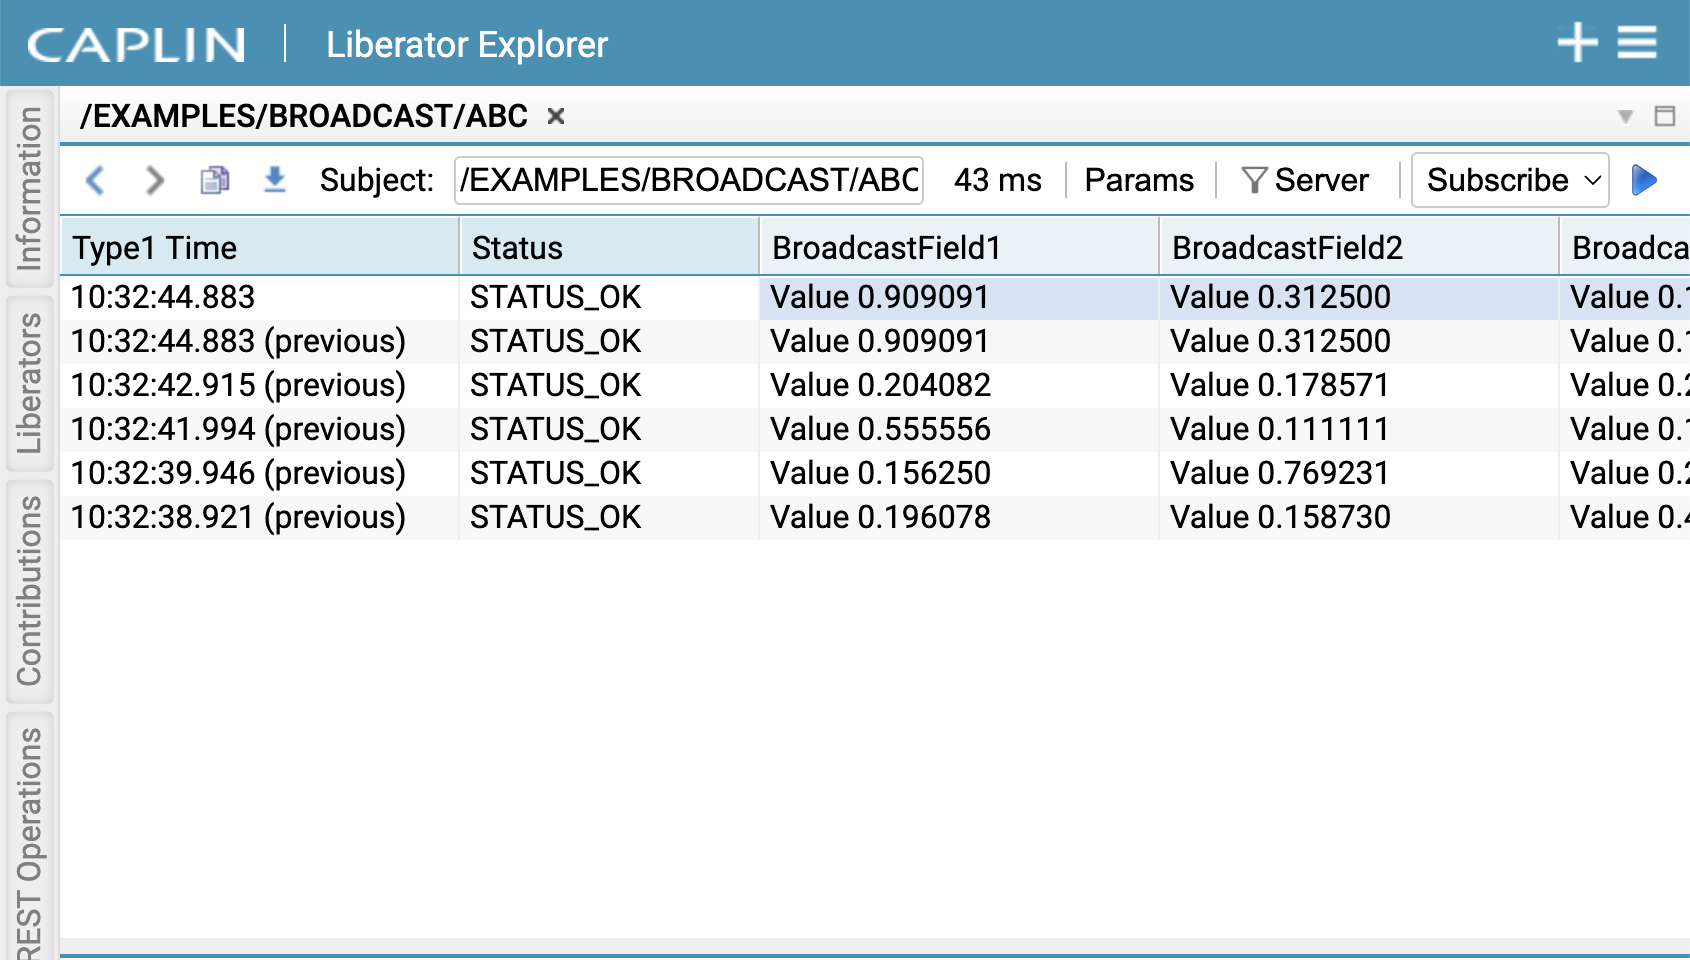
You can only subscribe to one subject in the grid. Selecting another subject in the list of subjects will subscribe to that one instead. Bring another subscription tab into view using the plus button to view multiple subscriptions at the same time.
Navigating through the subject directory
Aside from entering a subject name directly in a subscription tab, you can also navigate through subject directories in a way that is similar to an operating system’s file explorer.
| If you can’t open a directory, it’s most likely because you don’t have permission to view its items. |
Publishing data (contributions)
Follow the steps below to see how to publish contributions.
| Data published to Liberator by client applications are called contributions. |
-
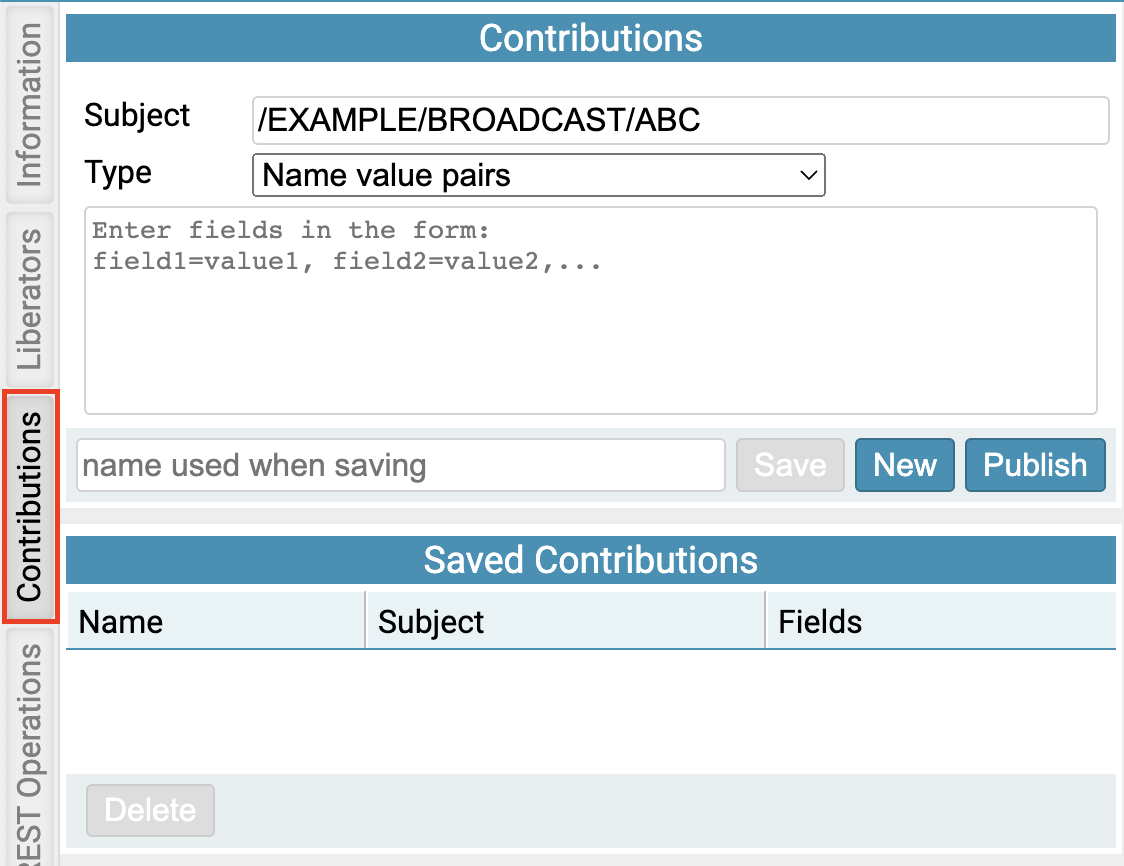
Click on the Contributions tab (by default this is found in the left tab bar).
-
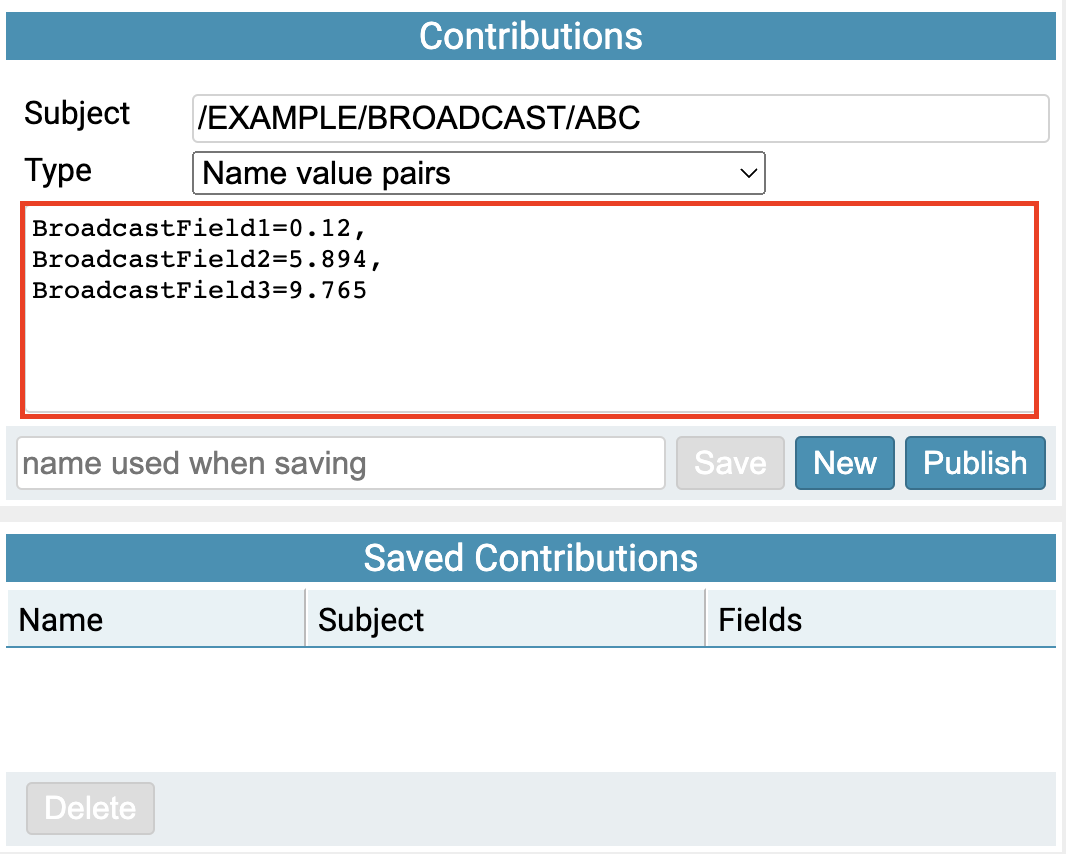
Type in the subject name you want the contribution to be sent to.
-
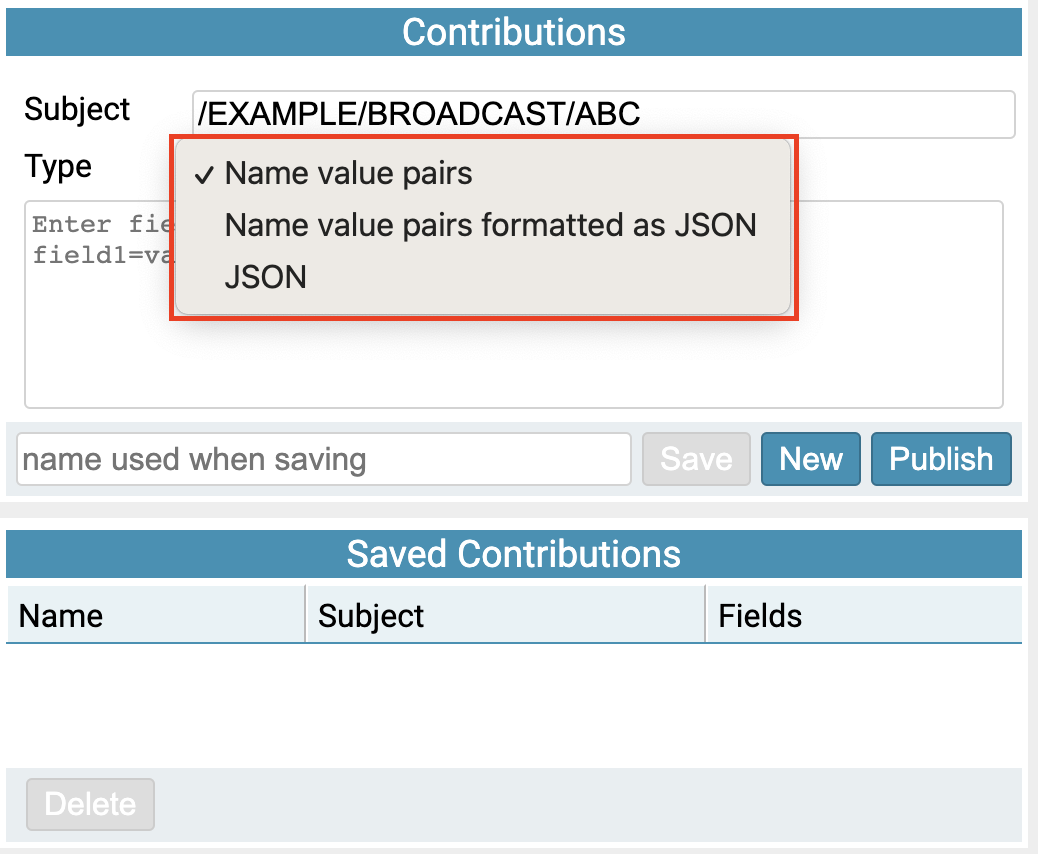
Select the 'Type'. This is the format you want to use to supply the contribution’s message to the subject. 'Name value pairs' is selected by default, but there are also options for JSON.
-
Enter data for the contribution in the selected format.
-
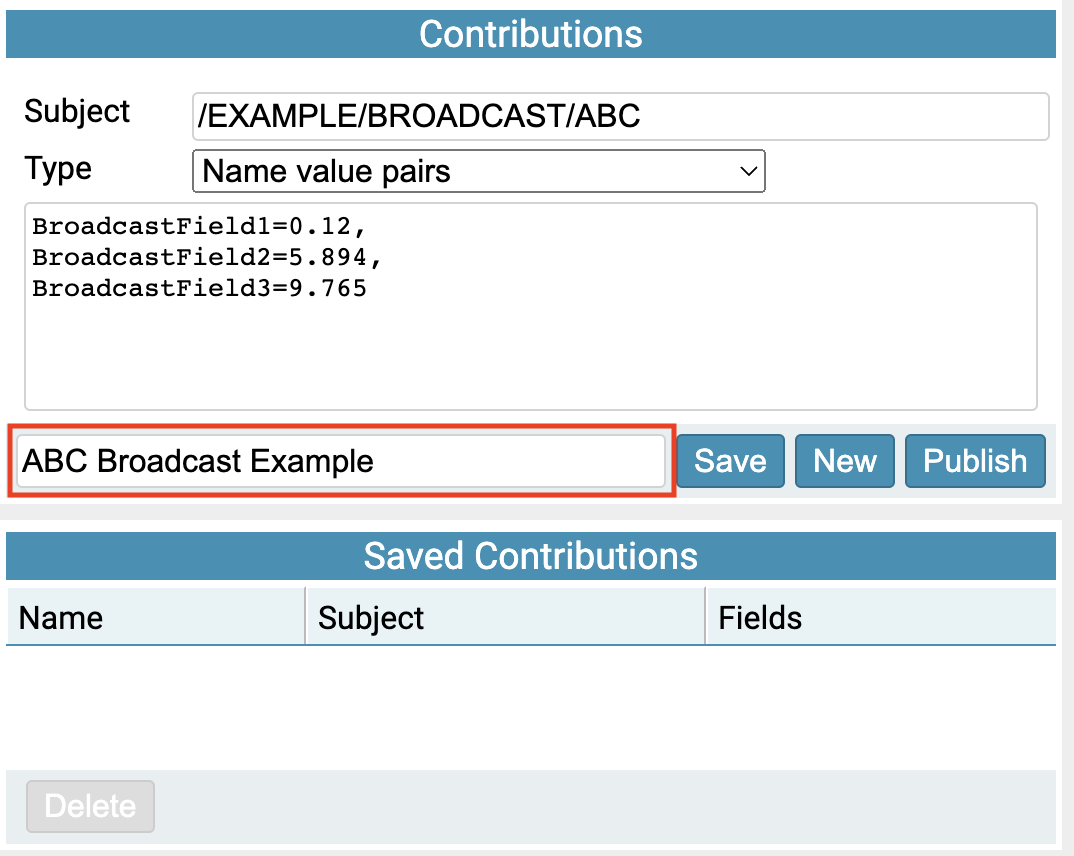
Enter the name of the contribution. If you save the contribution, you can use this name to identify it when you want to publish it.
-
Click Save to add the new contribution.

-
To send the contribution to the Liberator, click 'Publish'.

Using the StreamLink log
Here’s an example of the StreamLink log.
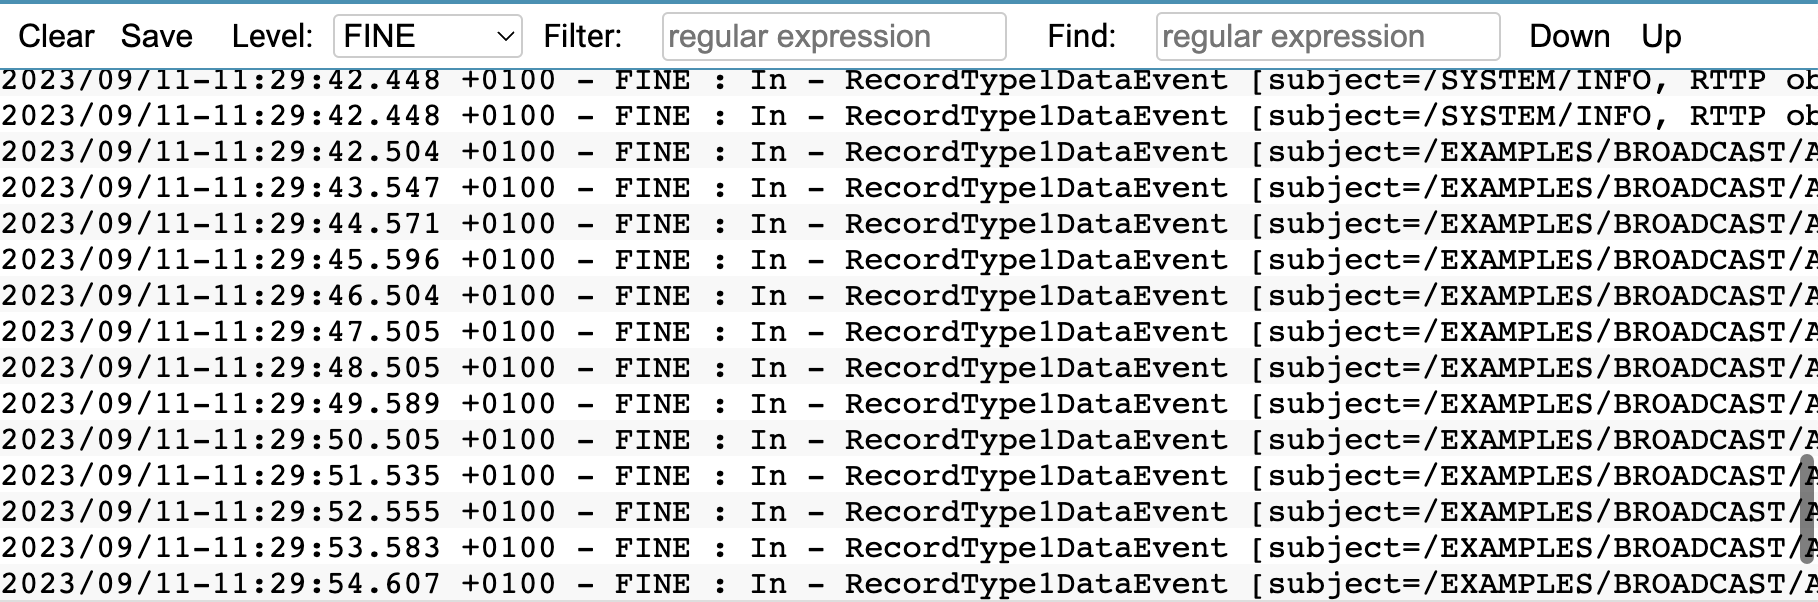
Manage the log using these items:
Clear |
Use the 'Clear' button to clear the logs. |
Save |
Use the 'Save' button to save a copy of the logs to your computer. |
Level |
Change the logging level by selecting from the dropdown list. |
Filter |
Filter which logs you want to see, using regular expression syntax. |
Find |
Find a specific log message, using regular expression syntax. |
Down/Up |
Navigate down to the bottom of the logs or up to the top. |
See also: