Create a ticket dialog
This tutorial explains how pop-up dialog boxes work in Webcentric, and shows you how to use either JavaScript or XML to trigger an FX Ticket dialog.
| The following example is for purely illustrative purposes, showing how you would go about implementing a ticket dialog using your own Presenter component. |
Pop-up Dialog Boxes in Webcentric
As well as the Terraces, Towers and Stacks of panels that Webcentric uses to create screen layouts, it also provides windowing components such as menus and popup dialogs. This tutorial will show you how to create a popup dialog containing a trade ticket, which is a popular use for dialog boxes in trading applications. They are also commonly used as component selectors; or forms for submitting and saving data.
The Caplin JS Libraries provide a service through which new dialogs and panels can be created within the application, which is called the WebcentricFrameManager; an implementation of the FrameManager interface offered in the Caplin core library set. FrameManager provides the necessary interface to open dialogs containing a resident component.
If you’ve got a Webcentric application up and running (such as FxTrader, which we will be using for our examples), it creates a new instance of WebcentricFrameManagerservice as it is loading, and registers it as a service on the ServiceRegistry. The call you will make is actually to the FrameManager interface directly, but the WebcentricFrameManager implementation will be used implicitly.
Creating an FX Ticket Dialog
What we’re going to do in this tutorial is to create a dialog containing a ticket component, that will pop-up and display on the screen when we trigger it. The best way to actually construct a ticket (or any similar form-based component), is by utilising the Presenter library. For the sake of this tutorial, we’re going to be using the ticket component already implemented in the ticket blade in FxTrader.
Using JavaScript
Executing the following piece of code after Webcentric has loaded, will cause a ticket dialog to appear on screen:
var oFrameManagerService = caplin.core.ServiceRegistry.getService("caplin.frame-manager-service");

var oComponent = caplin.component.ComponentFactory.createComponent("<br.presenter templateId='your.presenter.template_id' presentationModel='your.presentation.ModelID'/>");

var sCaption = "your.presenter.template_id";
var nWidth = 356;
var nHeight = 455;
var oFrameCreationListener = {onFrameReady:function(oFrameComponent){}};

oFrameManagerService.openDialog(oComponent, sCaption, nWidth, nHeight, oFrameCreationListener);
The first line gets a reference to the FrameManager (which as you’ll remember, calls the WebcentricFrameManager class) from the ServiceRegistry. Next, the ticket component is created using the component library. Finally, the openDialog() method is called to display the dialog on screen.
Using XML
You can also create Webcentric dialogs via actions defined in the Webcentric XML configuration. The <showDialog> action can be placed within a <MenuItem> tag, to be executed when that menu item is clicked. (For more information about Webcentric actions see the Architectural Overview and the Webcentric XML reference.)
First of all, add the <showDialog> action to the <Declarations> element of your main layout file, where you will define the dialog’s parameters, and call the Presenter component to populate it, as we saw in the JavaScript example. When this action is invoked, it will trigger the nested <caplin:Dialog> to show up on screen:
<Declarations>
  . . .
  <showDialog id="ticket_dialog" defer="true">
    <caplin:Dialog identifier="fx-ticket" decorators="dialogDecorator" dialog="true" width="356" height="455" position="CENTER" caption="New Ticket Dialog">
      <state>
        <br.presenter templateId='your.presenter.template_id' presentationModel='your.presentation.ModelID'/>
      </state>
    </caplin:Dialog>
  </showDialog>
  . . .
</Declarations>
Having done that, we need a way to invoke it, so we’ll add a new item onto the existing menu, which will invoke our showDialog action when clicked. The <showDialog> tag in the <menuItem> element does not define the dialog, but refers to the action we declared previously, by means of an xpath expression to the <showDialog> node with id attribute "ticket_dialog", like this:
<MenuItem menu_id="fx" label="@{menu.fx}" context="insert">
. . .
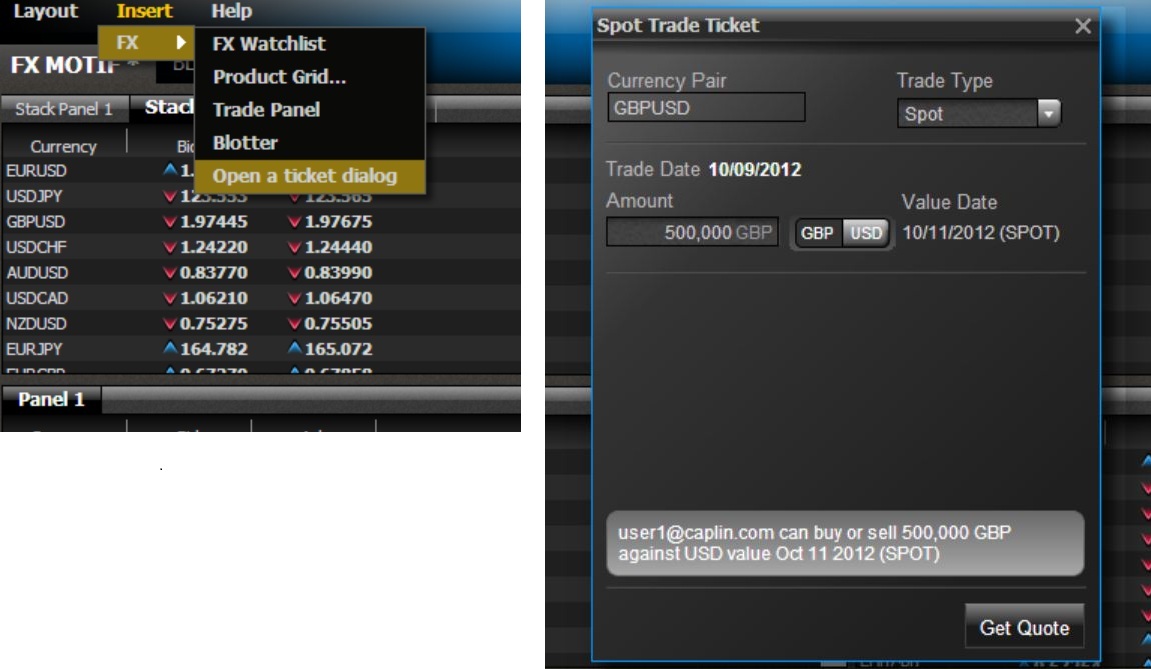
<MenuItem menu_id="new_ticket_dialog" label="Open a ticket dialog" context="insert">
<showDialog event="DOMActivate" xref="Declarations/showDialog[@id='ticket_dialog']" defer="true"/>
</MenuItem>
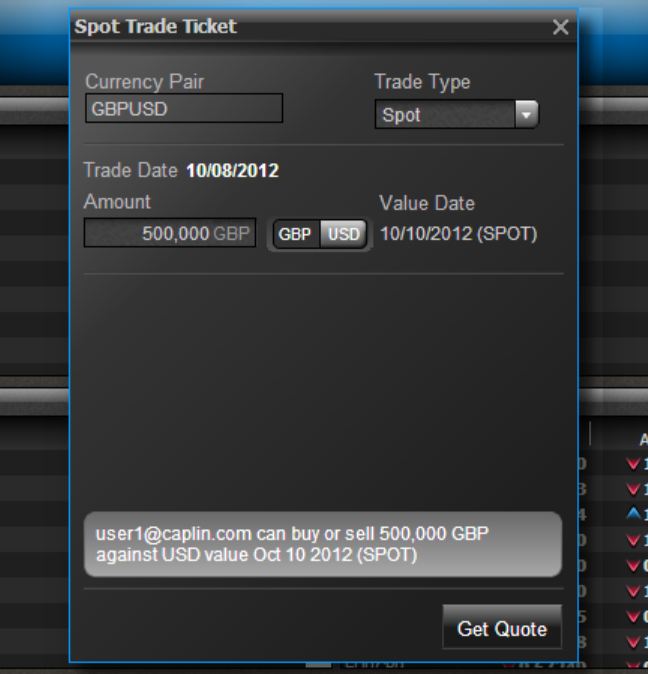
</MenuItem>You should now be able to open a new ticket dialog by means of the menu, as shown below.